Young Radish Kimchi: The Perfect Summer Recipe
Young Radish Kimchi: The Perfect Summer Recipe
When the heat of summer hits, your appetite has a way of disappearing entirely. But set a plate of cold, crisp yeolmu kimchi on the table, and suddenly a whole bowl of rice vanishes without a second thought. Yeolmu kimchi is more than just a side dish — it’s a symbol of Korean summer food culture and one of the country’s most beloved fermented foods. Pair it with cold noodles or bibimbap and everything tastes twice as good. And that chilled, tangy brine from a freshly made batch? No drink on earth can replicate that kind of refreshment.
Today we’re going deep — the history and cultural roots of yeolmu kimchi, the science behind its fermentation, its nutritional profile, and a complete, foolproof recipe you can make at home.
Note: The health information in this article is for general educational purposes only and is not intended as medical advice.
The History and Cultural Background of Yeolmu Kimchi
Yeolmu (열무, 熱務) literally means “summer radish.” It’s a young, tender radish harvested mainly from late spring through early summer. The roots of yeolmu kimchi stretch back to the Joseon Dynasty, where texts like Gyuhap Chongseo and Eumsik dimibang — two landmark culinary records from the late Joseon period — documented various water kimchis and fresh-tossed varieties. Yeolmu kimchi as we know it traces its origins to those recipes.
The version made with gochugaru (red chili flakes) that we eat today came together after the 17th century, when chili peppers spread across the Korean peninsula. From that point on, the recipe settled into the form that’s been passed down through generations.
Yeolmu kimchi became especially prominent in the Seoul and Gyeonggi regions. It earned a permanent place as an essential topping for cold noodles in summer. While Pyongyang-style naengmyeon uses dongchimi brine, bibim naengmyeon and Seoul-style cold noodles wouldn’t be complete without yeolmu kimchi. For centuries, it’s been the go-to appetite reviver for people worn down by summer heat — a seasonal kimchi that Korean households make almost without thinking every year.
Recipes vary by family and region. Some add glutinous rice paste, others skip anchovy fish sauce in favor of salted fermented shrimp only. Every household has its own version, and that variety is exactly what makes it so interesting.
The Science Behind Yeolmu Kimchi Fermentation
Yeolmu kimchi ferments through anaerobic (oxygen-free) fermentation driven by lactic acid bacteria (LAB). Three key microorganisms do most of the work:
- Leuconostoc mesenteroides: The dominant bacteria in the early stages of fermentation. It produces carbon dioxide, lactic acid, and acetic acid, creating that clean, bright, refreshing flavor that freshly made kimchi is known for.
- Lactobacillus plantarum: As acidity builds, this acid-tolerant strain takes over and drives the sour flavor deeper. It’s the reason well-fermented kimchi has that sharp, satisfying tang.
- Lactobacillus sakei: Found mostly in aged kimchi, this strain contributes to the development of umami and overall depth of flavor.
Young radish has higher water content and more tender tissue than napa cabbage or mature radish, so it ferments faster. During the salting step, osmosis pulls moisture out of the cells, creating a briny environment that suppresses harmful bacteria while giving lactic acid bacteria exactly the conditions they need to thrive. Garlic and ginger add another layer of defense — their antimicrobial compounds (allicin and gingerol, respectively) keep unwanted microbes in check and support a healthy fermentation environment.
Adding glutinous rice paste or flour paste supplies carbohydrates that feed the lactic acid bacteria, giving fermentation an extra boost.
Temperature makes a real difference. At 4–10°C, fermentation moves slowly, keeping sourness mild and texture crisp for longer. Above 20°C, fermentation accelerates and the kimchi turns sour quickly. In summer, one to two days at room temperature is typically all you need before moving it to the refrigerator.
Nutritional Content and Health Benefits of Yeolmu Kimchi
Young radish is low in calories but packed with nutrients. The table below shows approximate values per 100g of yeolmu kimchi.
| Nutrient | Amount (per 100g) | Key Benefits |
|---|---|---|
| Energy | ~20–30 kcal | Low-calorie food |
| Dietary Fiber | ~1.5–2.0 g | Supports digestion, increases satiety |
| Vitamin C | ~15–20 mg | Antioxidant, immune support |
| Beta-Carotene | ~500–700 μg | Antioxidant, eye health |
| Calcium | ~50–70 mg | Bone health |
| Sodium | ~400–600 mg | ⚠️ Monitor intake — can be high |
| Lactic Acid Bacteria | ~10⁷–10⁹ CFU | Supports gut microbiome balance |
The lactic acid bacteria produced during fermentation can feed beneficial gut microbes or directly contribute to a healthier gut environment. Fermentation is also known to increase levels of B vitamins, particularly B12 and folate. The capsaicin in gochugaru may help stimulate metabolism, and allicin from garlic carries antimicrobial and antioxidant properties.
A note on sodium: At 400–600mg per 100g, yeolmu kimchi can be high in sodium. People managing blood pressure or sodium intake should keep portions in mind.
The Perfect Yeolmu Kimchi Recipe
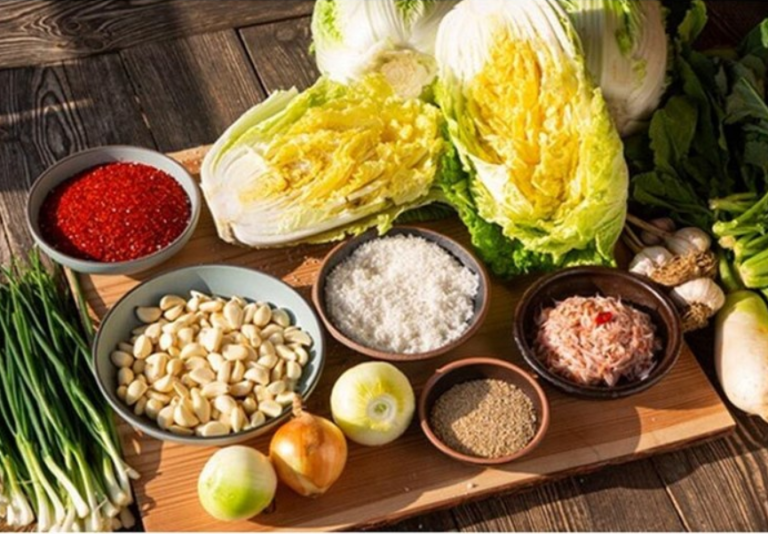
Ingredients (Serves 4, makes approximately 1kg)
- 1 bunch young radish / yeolmu (approximately 800g–1kg)
- 3–4 tablespoons coarse sea salt (for salting)
- 3–4 tablespoons gochugaru (Korean red chili flakes)
- 2 tablespoons anchovy fish sauce
- 1 tablespoon salted fermented shrimp (saeujeot)
- 1½ tablespoons minced garlic
- ½ teaspoon minced ginger
- 1 tablespoon maesil (green plum) syrup or sugar
- 3 tablespoons glutinous rice paste (made from 1 tablespoon glutinous rice flour + 200ml water, cooked)
- 1 small bunch green onions or garlic chives (approximately 50g)
- 200–300ml water (for adjusting consistency)
Step-by-Step Instructions
Step 1 — Prep and Salt the Yeolmu
Rinse the young radish thoroughly under running water two or three times to remove any dirt or grit. Trim only the very ends of the roots — don’t cut too much off. Chop into 5–6cm lengths. Sprinkle the coarse salt evenly over the radish and let it sit for 30–40 minutes.
Young radish is much more delicate than napa cabbage, so don’t over-salt it or it will go limp. After salting, rinse once to remove excess salt, then drain in a colander. When you taste a piece, it should still carry a faint saltiness — that’s the right point.
Step 2 — Make the Glutinous Rice Paste
Combine 200ml of water and 1 tablespoon of glutinous rice flour in a small saucepan. Cook over low heat, stirring constantly, until the mixture thickens into a smooth paste. This paste helps the seasoning cling to the radish and gives the lactic acid bacteria extra sugars to feed on during fermentation. Let it cool completely before using.
Step 3 — Mix the Seasoning
In a large bowl, combine the gochugaru, anchovy fish sauce, salted shrimp, minced garlic, minced ginger, maesil syrup (or sugar), and the cooled rice paste. Stir everything together well. Add 200–300ml of water gradually, mixing as you go, until the seasoning reaches a slightly loose consistency. Yeolmu kimchi seasoning should be thinner than what you’d use for baechu (napa cabbage) kimchi — that extra liquid becomes the refreshing brine.
Step 4 — Toss Everything Together
Add the drained yeolmu and green onions (or garlic chives) to the seasoning bowl. Gently toss with your hands — be careful not to squeeze or crush the radish. It’s tender and will bruise easily. Taste and adjust seasoning with a little more fish sauce or salt if it needs it.
Step 5 — Ferment and Store
Transfer the kimchi to an airtight container. Leave it at room temperature (around 20–25°C) for half a day to a full day to kick off the initial fermentation, then move it to the refrigerator. In summer, half a day at room temperature is usually enough — the warmth works fast. The flavor hits its peak around 3–5 days after refrigerating. Try to finish it within 2 weeks for the best taste and texture.
How to Eat Yeolmu Kimchi
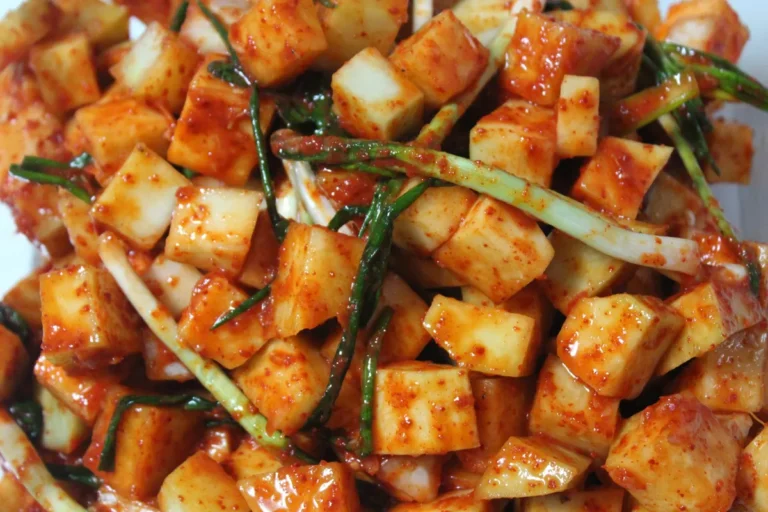
Fresh out of the bowl — what Koreans call the geotjeori stage — yeolmu kimchi is already delicious with a simple bowl of hot rice. After 2–3 days of fermentation, the flavor transforms. The sourness deepens, the brine chills beautifully, and it becomes the perfect topping for cold buckwheat noodles or bibim naengmyeon. That cold, tangy liquid poured over noodles on a sweltering summer afternoon is one of those food experiences that’s genuinely hard to describe until you’ve had it yourself.
However you eat it, yeolmu kimchi is summer in a bowl — crisp, bright, alive with fermentation, and endlessly refreshing.