Homemade Makgeolli: Brewing From Scratch With Nuruk
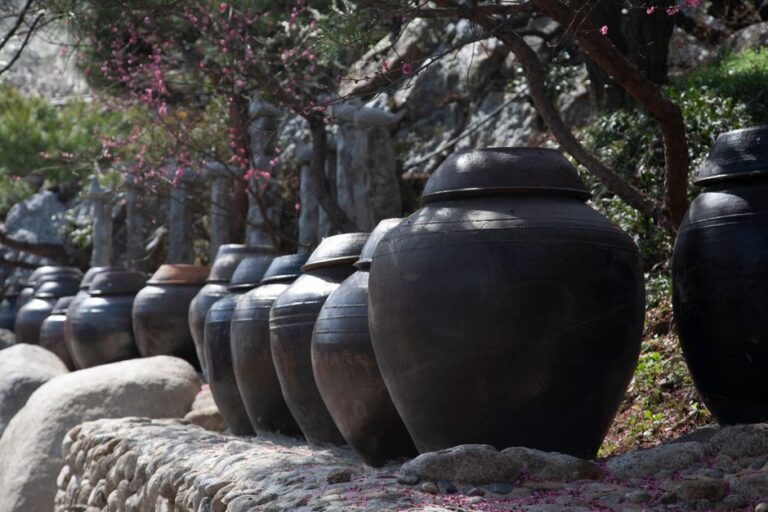
Makgeolli is more than just a drink. It carries thousands of years of Korean fermentation culture in every milky, slightly fizzy sip. Farmers drank it at the edge of rice paddies. Families brewed it at home for generations. These days, a growing wave of home brewers is bringing that tradition back to life — and some are going further than just picking up a packet of commercial starter from the store. Today, we’re diving deep into the full process: making traditional nuruk from scratch, then using it to brew a proper batch of makgeolli.
The History and Culture Behind Makgeolli
Makgeolli’s roots stretch back to before the Three Kingdoms period. The Goryeo-era text Goryeo Dogyeong (高麗圖經) describes “a cloudy liquor enjoyed by common people,” and by the Joseon dynasty, home-brewing recipes appeared in books like Gyuhap Chongseo and Eumsik Dimibang. The name itself tells you something: “makgeolli” roughly means “roughly strained liquor.” Depending on the region and the social class of whoever was drinking it, it also went by names like takju (濁酒, cloudy wine), nongju (農酒, farmer’s wine), and hoiju (灰酒).
The Japanese colonial period nearly broke this tradition entirely. The Liquor Tax Law (酒稅令) banned home brewing, cutting off centuries of household fermentation culture almost overnight. Later, during rapid industrialization, wheat flour replaced rice as the base ingredient, and diluted, factory-made makgeolli became the standard for decades. But starting in the 2000s, a renewed interest in traditional food culture — along with the wellness movement — brought rice-based and unpasteurized makgeolli back into the spotlight. Today, small craft breweries and home brewers across Korea are making makgeolli in wildly different and personal ways.
The Science of Makgeolli Fermentation: What Lives Inside Nuruk
Everything starts with nuruk (麴). Nuruk is a fermentation starter made by grinding grains — usually wheat or rice — pressing them into a block, and letting wild microorganisms colonize the surface naturally. This is fundamentally different from Japanese sake production, which uses a single cultivated mold, Aspergillus oryzae (황국균), grown on grain under controlled conditions. Korean nuruk is a whole ecosystem.
The Key Microorganisms in Nuruk
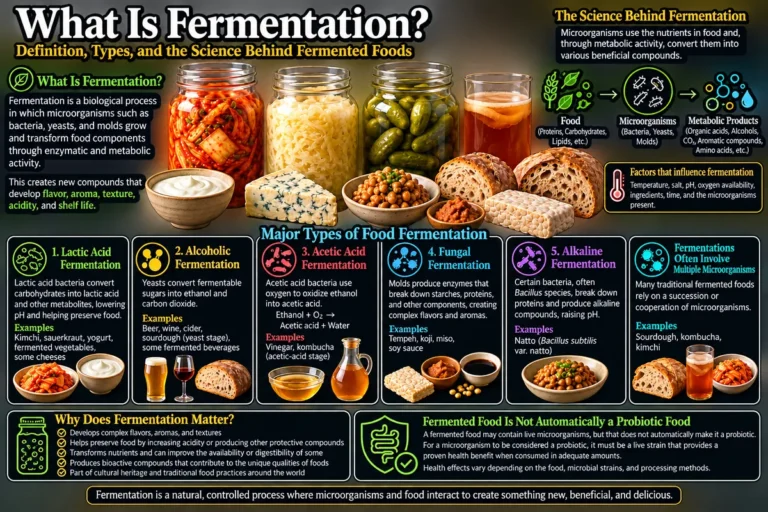
- Filamentous fungi (molds): Primarily Rhizopus oryzae, Aspergillus oryzae, and Mucor species. These secrete amylase and protease enzymes, breaking down starches into sugars and proteins into amino acids.
- Yeasts: Saccharomyces cerevisiae and other wild yeast strains carry out alcoholic fermentation, converting sugars into ethanol and carbon dioxide. (C₆H₁₂O₆ → 2C₂H₅OH + 2CO₂)
- Lactic acid bacteria (LAB): Strains from the genus Lactobacillus produce lactic acid, which gives makgeolli its characteristic tangy brightness. They also act as natural preservatives by inhibiting unwanted microbial growth.
- Acetic acid bacteria: Present in small amounts. If fermentation goes too long or temperatures spike, these bacteria can push the flavor toward vinegar. This is one of the main reasons temperature control matters so much.
Makgeolli ferments through a process called parallel fermentation (병행복발효, 竝行複醱酵). Saccharification — the conversion of starch into sugar — and alcoholic fermentation happen simultaneously in the same vessel. It’s rare in the global history of brewing and is one of the main reasons makgeolli has such a complex, layered flavor that’s hard to replicate.
What’s Actually in Makgeolli
| Component | Amount (per 100mL, unpasteurized) | Notes |
|---|---|---|
| Alcohol | 6–8% | Product of yeast fermentation |
| Protein | ~0.5–1.0g | From rice protein and dead yeast cells |
| Organic acids | Lactic, malic, citric acids | Tangy flavor, natural preservation |
| Carbohydrates | ~2–4g | Residual sugars and dextrins |
| Live cultures | ≥10⁸ CFU/mL | Unpasteurized only; killed by heat treatment |
| Sodium | ~2–10mg | Relatively low |
Note: This information is for educational purposes only and is not intended as medical or nutritional advice.
How to Make Traditional Nuruk From Scratch
Making nuruk is the most time-consuming part of this whole process. You need at least 3 to 4 weeks for it to ferment and dry properly, so plan to start your nuruk about a month before you want to brew. Don’t rush this part.
Ingredients
- 1kg whole wheat (or coarsely ground wheat flour)
- 150–180mL water (15–18% of the wheat’s weight)
- A nuruk mold frame, or a tightly woven cotton cloth
Step-by-Step Nuruk Instructions
- Step 1 – Prepare the wheat: Coarsely grind the whole wheat so that about 20–30% of the bran remains intact. Too fine a grind makes it hard to control moisture and increases the risk of over-fermentation.
- Step 2 – Add water: Slowly pour water into the ground wheat a little at a time, mixing as you go. The texture is right when you can squeeze a handful and it holds its shape, then slowly crumbles apart when you open your hand.
- Step 3 – Shape the block: Line a nuruk frame (or cloth) with cotton and press the mixture in firmly. Traditional practice calls for stomping the block down with your feet. Aim for a thickness of 7–10cm.
- Step 4 – Ferment (띄우기): Wrap the shaped block in straw or cotton cloth and stand it upright in a space with a temperature of 25–35°C and humidity of 70–80%. For the first week, flip it every three days.
- Step 5 – Dry and cure: After 3–4 weeks, you should see white and yellow mycelium (fungal threads) on the surface. Move the nuruk to a shaded, well-ventilated spot and let it dry and cure for another 2–4 weeks. Store the finished nuruk in a cool, dry place.
Basic Rice Makgeolli Recipe (Makes ~1.8L)
With nuruk ready to go, it’s time to brew. This recipe uses the single-mash method (단양주, 單釀酒), which is the most straightforward approach and a great starting point for first-timers.
Ingredients
- 500g non-glutinous rice (or glutinous rice, or a mix)
- 100g traditional nuruk (20% of the rice weight)
- 700mL–1L water, boiled and cooled
- A sterilized earthenware jar or glass fermentation vessel (at least 2L capacity)
Brewing Instructions
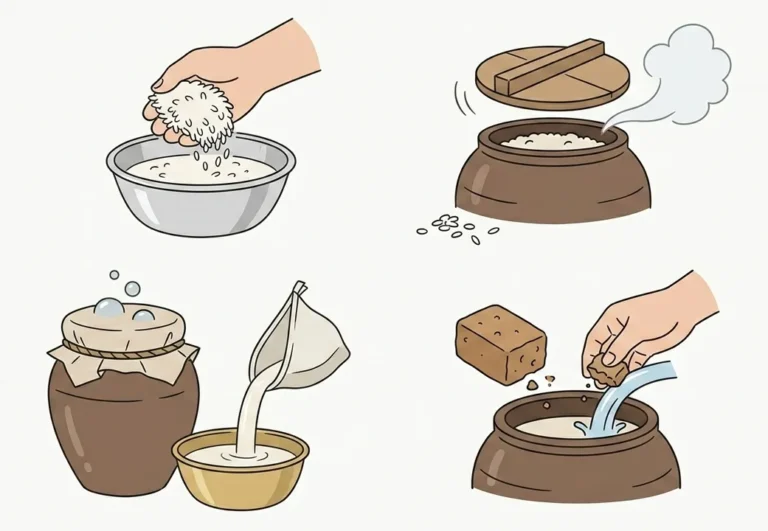
- Step 1 – Prepare the rice: Rinse the rice thoroughly, then soak it for at least 6–8 hours. Steam it in a steamer to make godubap — a firm, dry-cooked rice. Spread the cooked rice out wide and let it cool completely to below 25°C before using. Warm rice will kill your microorganisms.
- Step 2 – Activate the nuruk: Break the nuruk into small pieces and soak them in 200mL of the boiled, cooled water for 2–3 hours. This step — making nuruk water (누룩물) — wakes up the enzymes and microorganisms inside the nuruk.
- Step 3 – Combine everything: In your sterilized fermentation vessel, combine the cooled godubap, the soaked nuruk (water included), and the remaining boiled, cooled water. Mix thoroughly with clean hands or a sanitized paddle.
- Step 4 – Early fermentation: Cover the vessel with a clean cloth or cotton cheesecloth and keep it somewhere warm — ideally 25–28°C. For the first 2–3 days, stir once or twice daily to introduce oxygen and promote even fermentation. Active bubbling is a good sign. That’s your CO₂.
- Step 5 – Check for completion: After 5–7 days, bubbling will slow down and a clearer layer will begin separating at the top. Taste it. You’re looking for a balance between sourness and sweetness. If it tastes right, it’s ready to strain.
- Step 6 – Strain: Pour the fermented mixture through a cotton cloth or fine sieve and press or squeeze out as much liquid as possible. That liquid is your makgeolli.
After straining, your makgeolli is ready to drink — though letting it rest in the refrigerator for a day allows flavors to settle and a pleasant light carbonation to develop. Give the bottle a gentle shake before pouring, since the solids will settle at the bottom. That cloudy swirl is the whole point.