Beginner’s Guide to Fermented Foods
Fermentation is the process by which microorganisms transform food.
Bacteria convert sugars into lactic acid. Yeasts convert sugars into alcohol. Molds break down proteins and starches into simpler compounds. In each case, the food that comes out is chemically different from the food that went in — different in flavor, texture, nutritional profile, and shelf life.
This guide covers the basic categories of fermentation, the microorganisms involved, and a simple recipe to start with. If you want the full science behind each type, read What Is Fermentation?; for a tour of every major Korean category, see Korean Fermented Foods Explained. This page is the practical starting point.
Fermentation is the process by which microorganisms break down organic matter to produce energy. It happens mainly under anaerobic (oxygen-free) conditions, generating byproducts like alcohol, organic acids, and carbon dioxide. Kimchi, doenjang (fermented soybean paste), ganjang (soy sauce), and makgeolli (Korean rice wine) — all of these are products of fermentation.
Three main types of microorganisms drive the process:
- Bacteria: Lactic acid bacteria like Lactobacillus and Leuconostoc break down sugars to produce lactic acid. That familiar tangy sourness in kimchi and yogurt? That’s lactic acid at work.
- Yeast: Species like Saccharomyces cerevisiae convert sugars into ethanol and carbon dioxide — the principle behind makgeolli, beer, and wine.
- Mold: Aspergillus oryzae, known as nuruk mold, secretes enzymes that break down proteins and starches. It’s responsible for the deep, savory complexity in doenjang, ganjang, and gochujang.
Here’s something worth understanding early on: fermentation and spoilage are both microbial processes, but they’re not the same thing. Fermentation means beneficial (or harmless) microorganisms are in control. Spoilage means the harmful ones have won. Managing salt levels, temperature, and pH is how you keep the good microbes in charge — and that’s really the whole game.
A History of Korean Fermented Foods
Korean fermentation culture stretches back further than most people realize. Murals in ancient Goguryeo tombs depict the brewing of alcohol, and the Chinese historical text Sanguo Zhi (Records of the Three Kingdoms) notes that the people of Goguryeo were skilled at “seonjangyang” — the art of fermenting and preserving food. That puts Korea’s fermentation tradition at over 2,000 years old, at minimum.
During the Joseon Dynasty, jang (fermented sauces and pastes) culture flourished. Classic culinary texts like Gyuhap Chongseo and Eumsik dimibang documented dozens of different methods for making jang. It was central to household life. Meju — the fermented soybean blocks used to make doenjang and ganjang — would be prepared in the 10th or 11th lunar month, dried through the winter, then used to make jang in the first lunar month of the new year. Every region had its own slight variations on this ritual, passing it down through generations.
Kimchi has its own fascinating arc. Early versions were simply vegetables preserved in salt. Red pepper didn’t arrive in Korea until after the Japanese invasions of 1592, and the bold, crimson kimchi we know today didn’t fully take shape until the 18th and 19th centuries. In 2013, the tradition of kimjang — the communal making and sharing of kimchi — was inscribed on UNESCO’s Intangible Cultural Heritage list. A well-deserved recognition.
Major Korean Fermented Foods at a Glance
| Fermented Food | Key Microorganisms | Fermentation Type | Notable Features |
|---|---|---|---|
| Kimchi | Leuconostoc, Lactobacillus | Lactic acid fermentation | Rich in lactic acid bacteria, high in dietary fiber |
| Doenjang | Aspergillus, Bacillus | Complex fermentation | Contains amino acids and isoflavones |
| Ganjang | Aspergillus, yeast | Complex fermentation | Rich in umami (glutamic acid) |
| Makgeolli | Saccharomyces, Lactobacillus | Alcohol and lactic acid fermentation | Contains protein and B vitamins |
| Gochujang | Aspergillus, yeast | Complex fermentation | Contains capsaicin and antioxidants |
What You Need to Get Started
You do not need special equipment for your first batch. A short checklist:
- A clean glass jar or food-grade container with a lid. For the kkakdugi recipe below, which makes about 1 kg, choose a container of 1.5 to 2 liters so there is room at the top. Fermenting vegetables release gas, and brine can rise.
- Coarse sea salt. Salt controls which microbes thrive. The recipe below uses coarse sea salt.
- Food-safe gloves. Gochugaru can irritate skin, and gloves keep your hands from adding unwanted microbes.
- A way to keep the vegetables under the brine. A clean spoon, a small plate, or a fermentation weight pressed on top works. Vegetables should stay submerged below the brine level, as the University of Illinois Extension advises.
- An airlock lid (optional). An airlock helps keep the environment oxygen-free, but the same source notes that fermenting is possible without one.
- A label and a date. Writing the start date helps you notice how the flavor changes from day to day.
Your First Fermentation Recipe: Kkakdugi (Radish Kimchi)
If you’re just getting started, kkakdugi is one of the best places to begin. It’s more forgiving than cabbage kimchi, and watching it ferment in real time is genuinely satisfying. The natural sugars and moisture in the radish feed the lactic acid bacteria, and over the course of a few days you can actually taste the transformation — the flavor deepens, a gentle sourness emerges, and the radish takes on a pleasant crunch.
Ingredients (makes approximately 1 kg)
- 1 Korean radish (mu), about 800g
- 2 tablespoons coarse sea salt (for salting)
- 3 tablespoons gochugaru (Korean red pepper flakes)
- 1 tablespoon minced garlic
- ½ teaspoon minced fresh ginger
- 1 tablespoon fish sauce (substitute soy sauce for a vegetarian version)
- 1 tablespoon maesil-cheong (green plum syrup) or sugar
- 3–4 stalks green onion (optional)
Steps
- Cut and salt the radish: Scrub the radish clean — no need to peel it. Cut into 2–3 cm cubes. Toss with the coarse salt, mix well, and let sit for 30 minutes to 1 hour. Flip the radish once halfway through.
- Drain: Transfer the salted radish to a colander and let it drain for 10–15 minutes. The liquid that comes out is salty from osmosis, so don’t rinse the radish — you want to keep that seasoning in.
- Make the seasoning paste: Combine the gochugaru, garlic, ginger, fish sauce, and maesil-cheong in a bowl. Mix the gochugaru in first for a deeper, more even color.
- Mix everything together: Put on food-safe gloves and toss the drained radish with the seasoning paste until every piece is coated. Cut the green onions into 3–4 cm lengths and fold them in.
- Ferment and store: Pack the kkakdugi into a clean, airtight container. Leave it at room temperature (18–22°C / 64–72°F) for 12 to 24 hours, then transfer to the refrigerator. That first day at room temperature gets the lactic acid bacteria going and develops a light, pleasant sourness. After 1–2 weeks in the fridge, the flavor deepens considerably.
Signs That Your Fermentation Is Working
- When you open the container, you feel or hear a slight release of gas — that’s carbon dioxide from active fermentation.
- A mild sour smell, clean and refreshing rather than off-putting.
- The radish looks slightly more translucent than when you started, and brine has accumulated at the bottom of the container.
Storage Tips and How to Avoid Common Mistakes
The two biggest beginner mistakes are poor hygiene and inconsistent temperature control. Always sterilize your fermentation vessel before use — either with boiling water or a wipe-down with food-grade alcohol. During fermentation, keep the solids submerged beneath the brine. Any surface exposed to air is an invitation for unwanted mold.
Temperature directly controls how fast fermentation moves. At room temperature (20–25°C / 68–77°F), fermentation is fairly quick and active. In the refrigerator (4–5°C / 39–41°F), it slows way down but continues gradually. You can tune the sourness of your kkakdugi by adjusting how long you leave it out before refrigerating. More time at room temp means a tangier result.
Fermentation or Spoilage? How to Tell
The most common beginner worry is something odd on top of the jar. Use these guidelines, which follow the University of Illinois Extension fermenting FAQ:
- A flat white film that is not fuzzy and does not form round patches is usually kahm yeast. The Extension describes it as very common on vegetables and safe.
- Fuzzy growth or round patches are not kahm yeast. Throw the batch out.
- Slimy texture or a spoiled, rotten smell means the batch has gone wrong. Discard it.
- Keep everything under the brine. Pieces that stick out into the air are where problems start.
- When in doubt, throw it out. A failed batch of radish costs very little. A food-safety mistake costs more.
A clean, mildly sour smell, a little bubbling, and brine that gathers at the bottom are normal signs of a healthy ferment, as described in the recipe above.
A Note on Sodium
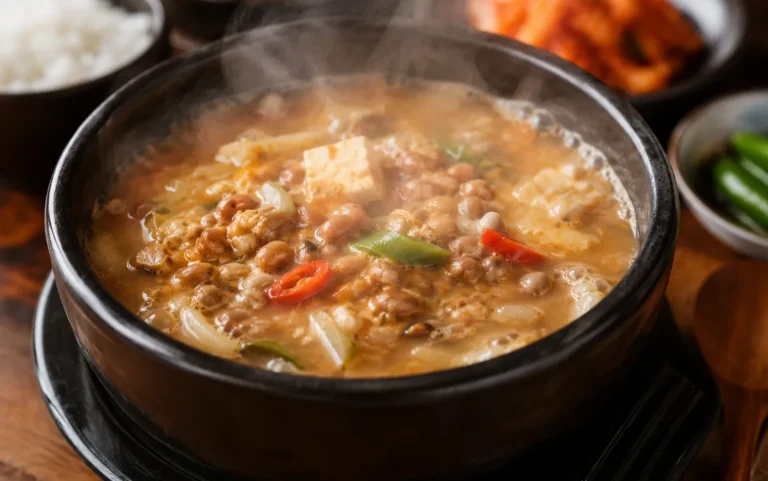
Most traditional Korean fermented foods — kimchi, doenjang, ganjang, gochujang — use salt as a core part of the fermentation process, which means they tend to be high in sodium. Napa cabbage kimchi, for example, contains roughly 400–700 mg of sodium per 100g. A single serving of doenjang jjigae (fermented soybean paste stew) can contain significant amounts as well. If you’re managing your sodium intake for health reasons, keep portion sizes in mind and consult with your healthcare provider. The information in this article is not intended as medical advice.
Where to Go Next
- What Is Fermentation? The definition and the science behind each type.
- Korean Fermented Foods Explained The major Korean categories side by side.
- Kkakdugi: The Full Recipe A more detailed version of the recipe above.
- How Many Types of Kimchi Are There? Varieties by region and ingredient.
- The Science of Kimchi Fermentation What happens inside the jar, step by step.
About This Article
The author, Hoon Kwak, has worked in food distribution for about 20 years, including work with a kimchi factory. Any home methods described here follow common practice and the guidance in the sources below. They are not laboratory-tested formulas.
Sources
- University of Illinois Extension. Fermenting FAQ. extension.illinois.edu
- UNESCO. Kimjang, making and sharing kimchi in the Republic of Korea. ich.unesco.org