Kkakdugi Recipe – The Secret to Perfect Crunch
Kkakdugi Recipe – The Secret to Perfect Crunch
The whole point of kkakdugi is the crunch. A radish cube that gives way without resistance has already failed. Getting that texture right depends on three things: the radish variety, how you salt it, and how long you wait before mixing the seasoning in.
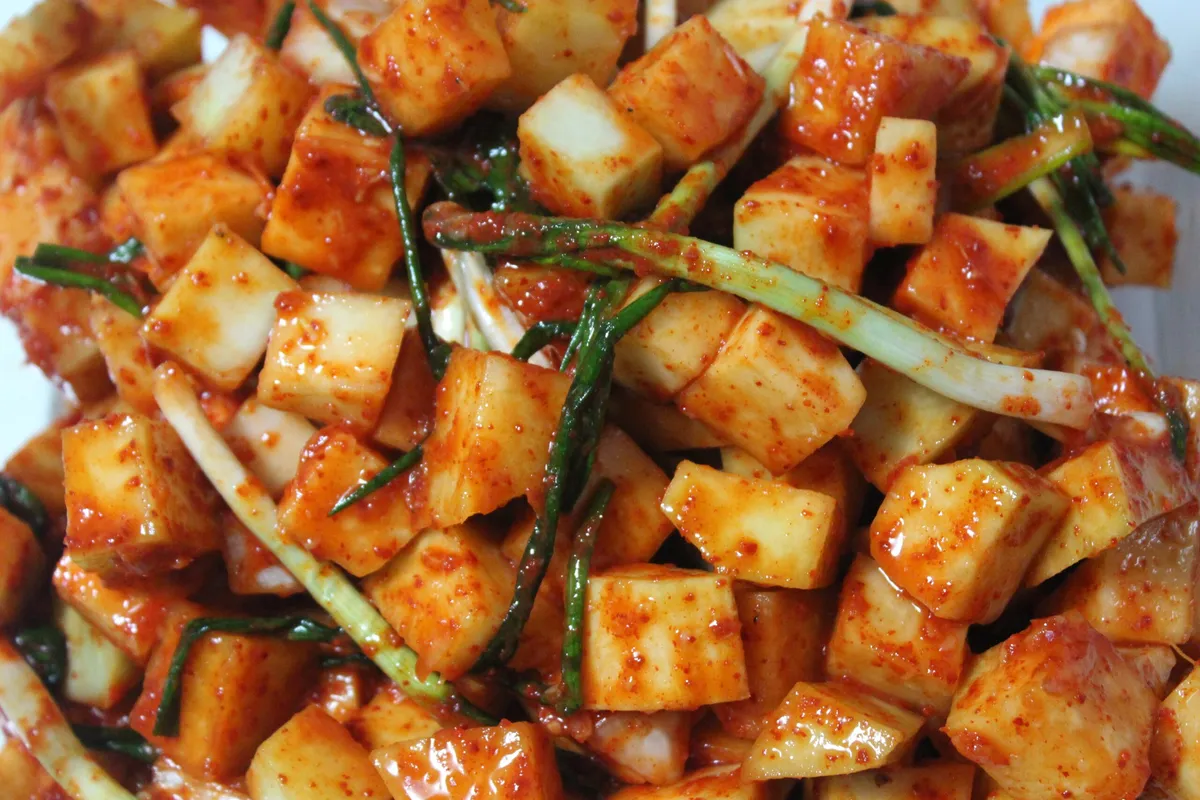
Kkakdugi is cubed radish kimchi. It’s one of the most popular kimchi varieties in Korea, sitting right behind baechu kimchi in terms of everyday table presence. It’s punchy, cold-weather food. The kind of thing you eat alongside seolleongtang or gomtang because the fat-rich broth needs something sharp and crackling to cut through it. Get it right and it’s one of the most satisfying fermented foods you’ll ever make. Get it wrong and it’s just spicy soggy radish.
Here’s what actually matters.
The Radish Is Everything – Pick It Right
The single biggest mistake home cooks make: using the wrong radish. Not all radishes are kkakdugi radishes. The Korean radish – called mu in romanization – is distinct. It’s shorter and fatter than a daikon. The skin is lighter, often with a greenish tinge at the top. The flesh is denser and slightly sweeter. It holds its structure during fermentation in a way that a long Japanese daikon simply doesn’t.
If you use a daikon and wonder why your kkakdugi went limp after three days, that’s your answer. Daikon has a higher water content and a different cell structure. It’ll ferment fine, but it won’t give you that signature snap.
Tip 1: Check the weight relative to size. A good mu should feel heavy for its size. Pick it up. It should feel almost uncomfortably dense. If it feels light or hollow, the interior has started to dry out – that radish will be pithy, and no amount of salting will fix pithy.
Tip 2: Look at the cut end if it’s exposed. The flesh should be white and firm, not translucent or spongy. Translucency means the radish is past its peak and has started breaking down internally. You’ll get texture problems in your finished kimchi.
Season matters too. Korean radishes harvested in late autumn through winter are at their peak. The cold slows growth and concentrates sugars. Summer radishes tend to be more porous and spicy-bitter in a way that doesn’t translate well to fermentation. If you’re making kkakdugi in winter or early spring with good-quality winter mu, you’re already ahead.
The Salting Step – Where Crunch Is Won or Lost
This is where most recipes give you bad advice. Or more precisely, where most recipes give you incomplete advice.
Salting draws moisture out of the radish through osmosis. That sounds simple. The complication is that under-salting leaves too much water in the cells, which means your kkakdugi gets diluted and mushy as it ferments. Over-salting collapses the cell walls completely and you get something limp and overly briny with no structural integrity left.
The standard instruction is “salt and let sit for 30-60 minutes.” That range is too wide. Here’s what actually works.
Cut your radish into roughly 3/4-inch cubes. Toss with fine sea salt – not table salt, not kosher salt – at about 1.5% of the radish’s weight. Weigh your radish, then calculate. For a 1 kg radish, that’s 15 grams of fine sea salt. Let it sit for exactly 45 minutes. Toss once at the halfway point.
After 45 minutes, taste a cube. It should be noticeably salty but not painfully so. The surface should feel slightly tacky. The cube should yield slightly when you press it but spring back. That’s your signal that the salting is working correctly without going too far.
Tip 3: Do not rinse. Many kkakdugi recipes tell you to rinse the salted radish before adding the seasoning paste. This is a carryover from baechu kimchi technique where rinsing helps control saltiness in a large cabbage that has absorbed a lot. With cubed radish, the salt penetrates differently. If you rinse, you’re washing away surface brine and disrupting the osmotic equilibrium you just spent 45 minutes building. Instead, drain the liquid the radish releases, taste for salt level, and adjust the seasoning paste accordingly.
A word on sodium: Kkakdugi is a high-sodium food. The National Institutes of Health recommends adults limit sodium to 2,300 mg per day. A serving of kimchi can contain anywhere from 200 to 500 mg of sodium depending on how it was made and how much you eat. If you’re managing blood pressure or have been advised to follow a low-sodium diet, eat kkakdugi in small portions or talk to your doctor before making it a daily staple.
The Seasoning Paste – Balance and Fermentation Science
The paste for kkakdugi is simpler than baechu kimchi. Fewer ingredients, which means every one of them matters more.
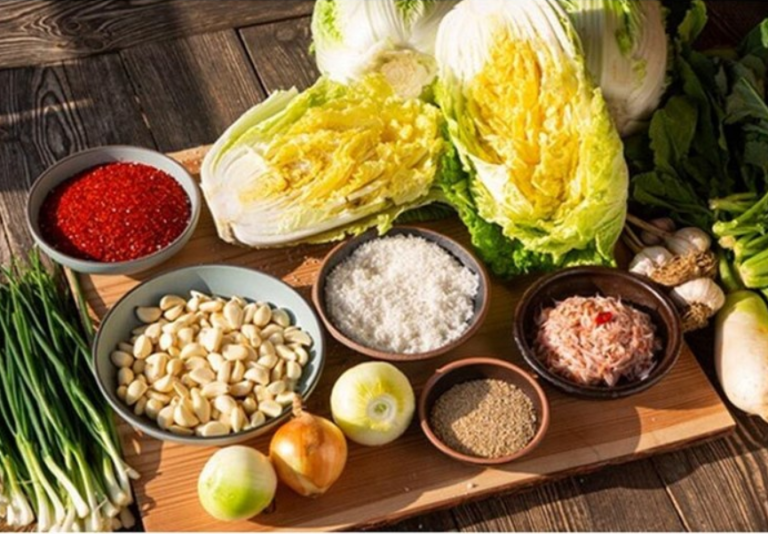
The core is gochugaru – Korean red pepper flakes. Not gochujang (which is a paste and adds sweetness and different fermentation dynamics), not cayenne, not paprika. Gochugaru has a specific heat level, color payoff, and slight fruity quality that makes kimchi taste like kimchi. It’s non-negotiable.
Beyond that: jeot (salted fermented seafood, typically saeujeot which is fermented salted shrimp), garlic, ginger, green onion, and sugar or Asian pear. The fermented shrimp does two things. It adds umami. And it introduces additional microbial communities that interact with the naturally occurring lactobacillus on the radish to shape the fermentation. If you skip it or substitute fish sauce alone, your kkakdugi will still be good, but it won’t ferment the same way or develop the same depth over time.
Garlic and ginger are measured fresh. Pre-minced jarred versions have had enzymatic activity disrupted. They’ll add flavor but won’t participate in fermentation the same way.
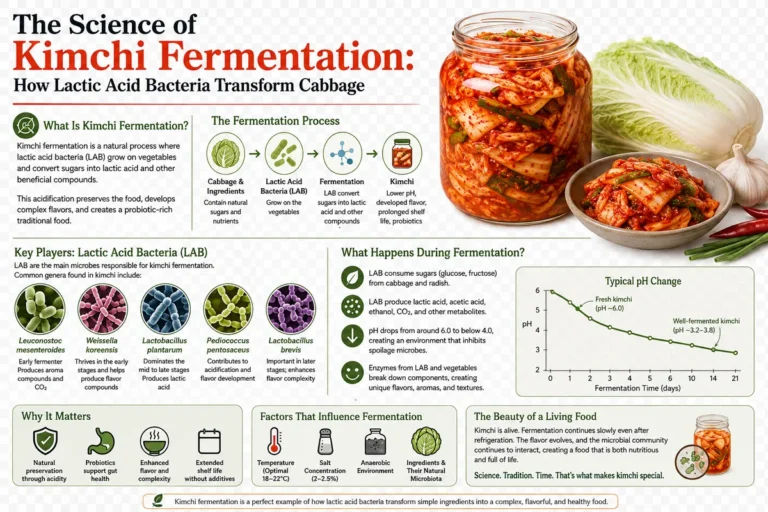
How the fermentation actually works: Kkakdugi ferments through lactic acid fermentation. Naturally occurring Lactobacillus and Leuconostoc bacteria on the radish produce lactic acid as they metabolize sugars. This acidification is what gives kimchi its sour complexity and also what preserves it. A study published in the Journal of Medicinal Food (Lee et al., 2016) found that fermented kimchi may support gut microbiome diversity, potentially due to the live cultures present during active fermentation. The operative word is “may” – kimchi’s probiotic effects are promising but ongoing research continues to refine what we know. The NIH’s National Center for Complementary and Integrative Health notes that fermented foods “may improve gut health” but calls for more clinical trials before drawing firm conclusions.
The paste also needs to be mixed in a specific order. Bloom the gochugaru in a small amount of the reserved radish liquid first. Let it hydrate for five minutes. This deepens the color and starts activating the flavor compounds. Then add the jeot, garlic, and ginger. Mix. Then add the radish and green onion. The blooming step is one most home recipes skip, and it’s one of the visible differences between home kkakdugi and restaurant quality.
The Full Kkakdugi Recipe
Makes: approximately 1.5 liters
Prep time: 1 hour
Fermentation time: 1-2 days at room temperature, then refrigerate
Ingredients:
- 1 kg Korean radish (mu), peeled
- 15 g fine sea salt (for salting)
- 40 g gochugaru
- 30 g saeujeot (salted fermented shrimp), roughly chopped
- 1 tablespoon fish sauce
- 6 cloves garlic, minced (about 30 g)
- 1 teaspoon fresh ginger, grated (about 5 g)
- 1 teaspoon sugar (or 2 tablespoons grated Asian pear)
- 4 stalks green onion, cut into 1-inch pieces
- 3 tablespoons reserved radish liquid (from salting)
Steps:
- Cut the radish into 3/4-inch cubes. Try to keep them uniform – inconsistent sizing means inconsistent fermentation and texture.
- Combine radish cubes with 15 g fine sea salt in a large mixing bowl. Toss thoroughly so every surface is coated. Let sit 45 minutes, tossing once at the 22-minute mark.
- Drain the liquid that has accumulated. Reserve 3 tablespoons of it. Do not rinse the radish.
- In a separate bowl, combine gochugaru and the 3 tablespoons of reserved radish liquid. Stir and let it hydrate for 5 minutes.
- Add saeujeot, fish sauce, garlic, ginger, and sugar to the gochugaru paste. Mix until combined.
- Add the salted radish and green onion pieces to the paste. Using gloved hands (the gochugaru will stain and irritate skin), mix thoroughly. Every cube should be coated in paste.
- Taste. It should be a little saltier and spicier than you want the final product to be – fermentation will mellow both. Adjust if it tastes flat or severely underseasoned.
- Pack tightly into a clean glass jar. Press down firmly so there are no air pockets. Leave about 1 inch of headspace – the contents will expand as fermentation produces carbon dioxide.
- Leave at room temperature (ideally 65-70°F / 18-21°C) for 24 hours in summer or up to 48 hours in winter. After 24 hours, taste daily until it reaches the sourness you want. The radish should still have significant crunch.
- Once it reaches your preferred sourness, move to the refrigerator. Cold fermentation slows the process dramatically. Kkakdugi keeps well refrigerated for 4-6 weeks. It continues to slowly develop flavor.
Fermentation, Storage, and What to Eat It With
Room temperature fermentation moves fast. In a warm kitchen in summer, 24 hours might be all you need. In winter, you might push 48 to 72 hours before you detect the right level of sour development. The kkakdugi is ready to eat at any point – fresh (geotjeori style, unfermented) it’s crunchy and spicy. As it ferments, the sourness builds and the flavor deepens. Most people prefer it somewhere between one and five days old.
Tip 4 (the one almost nobody mentions): The press-down ritual. Every time you open the jar to taste or serve, press the contents back down below the brine. Air exposure at the surface can lead to yeast film forming on top – this is kahm yeast, it’s not dangerous, but it adds off-flavors. Pressing the radish back down keeps it submerged in its own liquid and prevents surface contact with air. This is standard practice in professional kimchi operations and almost entirely absent from home recipes.
After a week in the refrigerator, kkakdugi enters what fermenters call its “mature” phase. The funk deepens. The sourness becomes more complex. The heat from gochugaru mellows into something rounder. Some people prefer it young and snappy. Some prefer it older and funky. Both are correct.
What to eat it with: the classic pairing is ox bone soup – seolleongtang or gomtang. The fatty, milky richness of the broth and the acidic crunch of the kkakdugi is one of the great flavor combinations in Korean food. It’s also excellent alongside beef radish soup (soegogi muguk), as a side with Korean fried chicken, or just eaten cold with a bowl of plain rice. The leftover brine – don’t throw it away – is excellent added to a quick doenjang jjigae for acidic depth, or used as a marinade base for pork.
Some studies suggest fermented foods like kimchi may support immune function and gut health. Research published in Cell (Wastyk et al., 2021) found that a high-fermented-food diet increased microbiome diversity in human subjects compared to a high-fiber diet – a meaningful finding, though researchers noted it was a short-term study and the long-term implications need further investigation. What we can say confidently is that kkakdugi, like most traditionally fermented vegetables, contains live cultures during its active fermentation phase and provides fiber from the radish itself.
Making kkakdugi is faster and more forgiving than baechu kimchi. The payoff is immediate – you can taste it fresh and watch it transform over days. Start with a good radish, salt it right, don’t rinse, bloom your gochugaru, press it down in the jar. That’s the whole secret. The crunch you’re after is achievable. Most of it was sitting in the choices you made before the recipe started.
This content is for informational purposes only and is not medical advice.